Tomato planting is something I look forward to every spring. I start counting the days from the time I start my first seed indoors to when I might have that first vine-ripened tomato in my hand, juices dripping down as I take a bite of the sweet, succulent flesh before it even makes it back to the kitchen.
But if I want to maximize tomato production and reap the benefits of a bumper crop, I need a good—no, great—tomato fertilizer to feed the soil and boost plant growth all season long.
Disclosure: If you shop from my article or make a purchase through one of my links, I may receive commissions on some of the products I recommend.
While it’s most convenient to go with an off-the-shelf tomato fertilizer (like this organic option from Espoma or this one from Dr. Earth, both of which I’ve used for a long time with good results), it’s worth putting in a little extra effort to make sure your tomato plants truly reach their fullest potential each season.
This in-depth guide will take you through the complete process of preparing the soil before planting and using my “secret ingredient” when it comes to tomato fertilizers: fish heads!
Yep, raw fish heads.
This unlikely and incredible soil amendment works wonders for other heavy-feeding, nitrogen-loving plants too, and I’ll show you exactly how to use fish heads as an organic source of fertilizer in your vegetable garden.
Which tomato varieties benefit from fish head fertilizer?
Let me start off by saying that no matter how many fish heads you throw at them, your tomato plants won’t thrive if they aren’t the right varieties for your climate.
To optimize growth in your garden, make sure you choose a tomato variety that matures well within your expected frost-free window. (You can find your first and last frost dates using my customizable planting calendar.)
If you have a short growing season, smaller tomatoes (or determinate tomatoes) do better than large, indeterminate beefsteak types that need three full months to ripen.
Related: Tomatoes still green? Here are four easy ways to ripen them on the vine
If you have specific environmental conditions that make growing challenging (for example, hot humid weather or previous infections in the garden), then a hybrid tomato variety that’s been bred for disease resistance will usually be a better choice over an heirloom seed variety.
Read more: These are the best-tasting heirloom tomato varieties—do you agree?
Favorite tomato varieties
Other than that, it doesn’t really matter what type of tomato you grow, as all tomatoes benefit from fish heads as fertilizer. So you can experiment with determinate or indeterminate, red or striped, slicing or cherry types, and they will all work.
The 2 things your tomatoes need for optimum growth
Tomatoes are fairly fuss-free. They don’t require any special conditions to sprout and they grow relatively quickly. Tomatoes do just as well in the ground as they do in growing in containers, and there are even tomato varieties that grow in shade.
But once they start producing more foliage, they need a lot of love to perform their best—their best meaning lots of flowers and lots of fruit.
In gardening parlance, tomatoes are called heavy feeders; that is, they require a lot of nutrients to flourish. They’re wild about fertilizer and before you even think about growing tomatoes, you should think about “growing” your soil first. Tomatoes like rich, amended soil teeming with worms and microbes.
Two key nutrients must be present for tomatoes to thrive:
- Phosphorus, which promotes the growth of flowers and fruit
- Calcium, which prevents blossom end rot (that dreaded black sunken hole on the flower end of your calcium-deficient tomatoes)
Providing these nutrients right from the start ensures you’ll grow tall, beautiful, healthy plants laden with juicy tomatoes that are sure to be the envy of all your neighbors.
To a lesser extent, tomato plants also need nitrogen, but too much nitrogen could result in a big, bushy, and green tomato plant with no flowers. With my soil prep method, however, you’ll be adding just the right amount of nitrogen to encourage healthy growth, while providing the phosphorus and calcium your plants need to produce loads of flowers (and ultimately, fruits).
First, prepare the garden bed
I start my tomato planting by preparing the bed at least a day or two before I transplant.
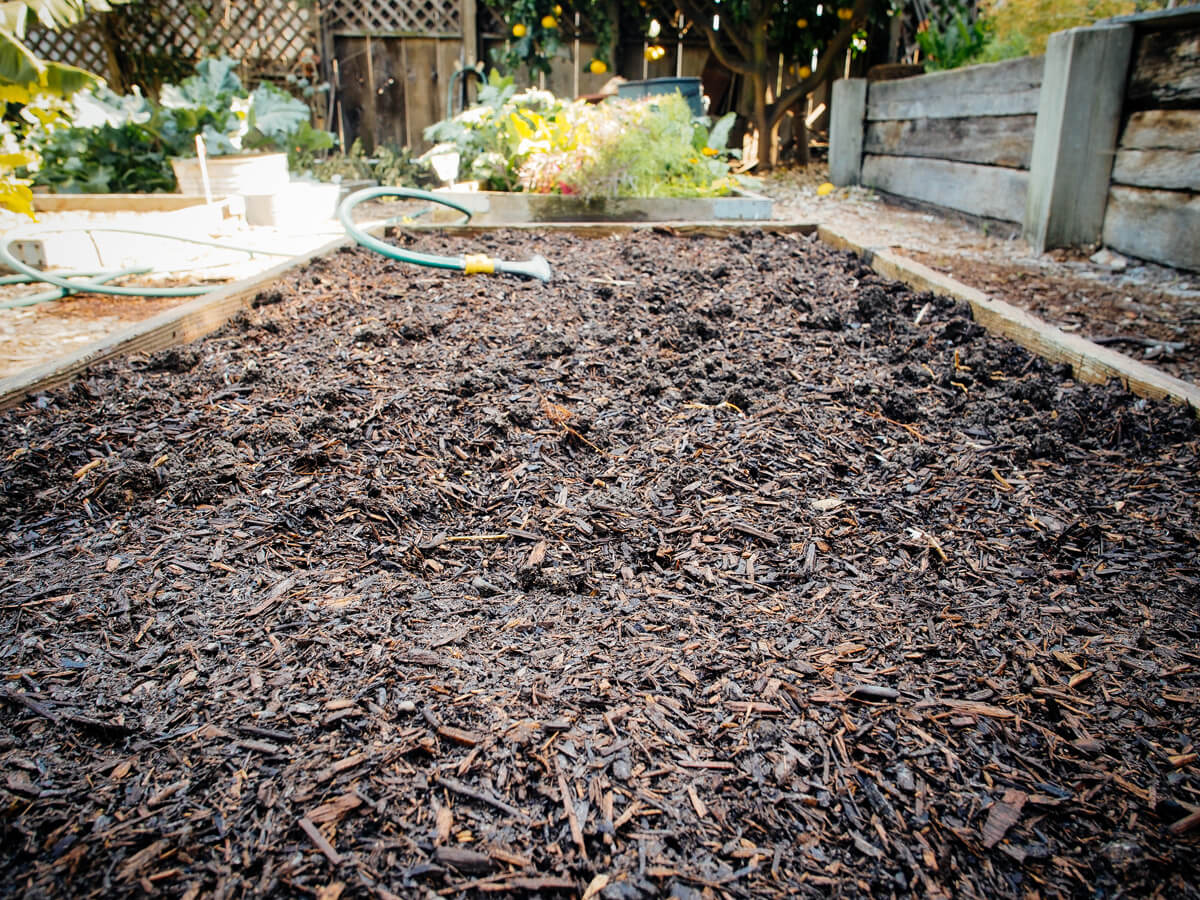
First, compost: Over an established but empty bed, I spread a 2- to 3-inch layer of well-aged compost; this can be compost made from kitchen scraps, leaf mold, bulk compost, or bagged compost.
(If you don’t have access to a good, organic, and aged compost locally, I recommend this one by Dr. Earth for a high-quality amendment you can buy online. It’s also available at some independent garden centers.)
Next, fertilizer: On top of the compost, I apply a granular, organic, all-purpose fertilizer (the one I like is a 4-4-4 blend). Those three numbers indicate the nutritional makeup of the fertilizer, also known as N-P-K, or nitrogen, phosphorus, and potassium.
Once the compost and fertilizer are spread across the bed, I rake or dig them in lightly to make sure the fertilizer is evenly incorporated, smooth out the soil, and water well.
There’s no need to dig the compost and fertilizer deep down into the soil—you can leave them right on the surface as a top dressing. Over time, they will work their way down to improve soil tilth and fertility.
After fully saturating the soil, I let the bed sit for a day or two for the soil to settle back in before I plant.
So, tomatoes. Let’s get them in!
Prepare your tomatoes for transplant (and give them a boost with the aspirin trick)
Generally, I start my seeds in late winter, repot the seedlings into 4-inch pots in early spring, and depending on how things are going in the garden, transplant the tomatoes (again) into 1-gallon pots or put them straight in the ground.
(Your sowing and transplanting timeline may vary with your particular climate, microclimate, and expected frost dates.)
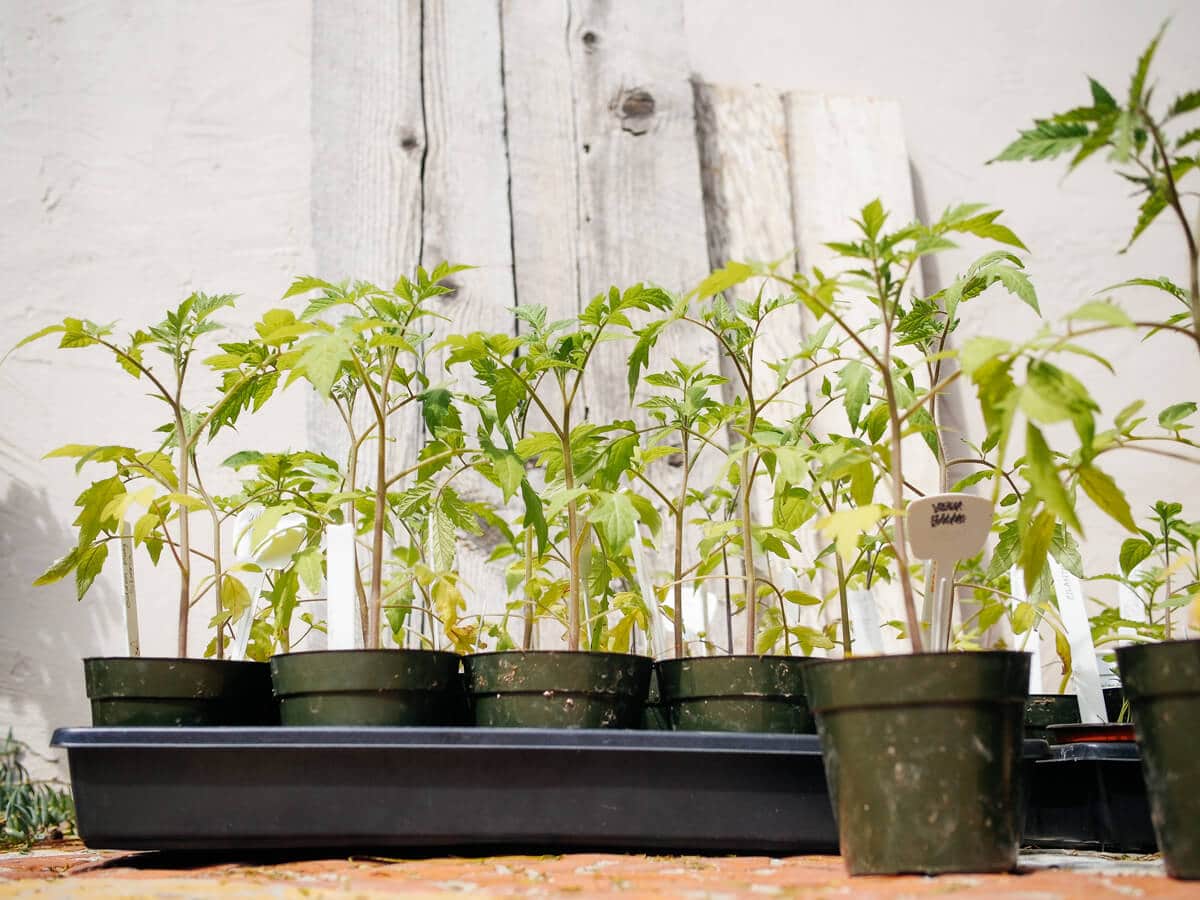
I always start with healthy plants about a foot tall, whether it’s a foot tall in a 4-inch pot or a foot tall in a 1-gallon pot.
This tomato seedling spent a week outside getting hardened off, and looks primed for the garden.
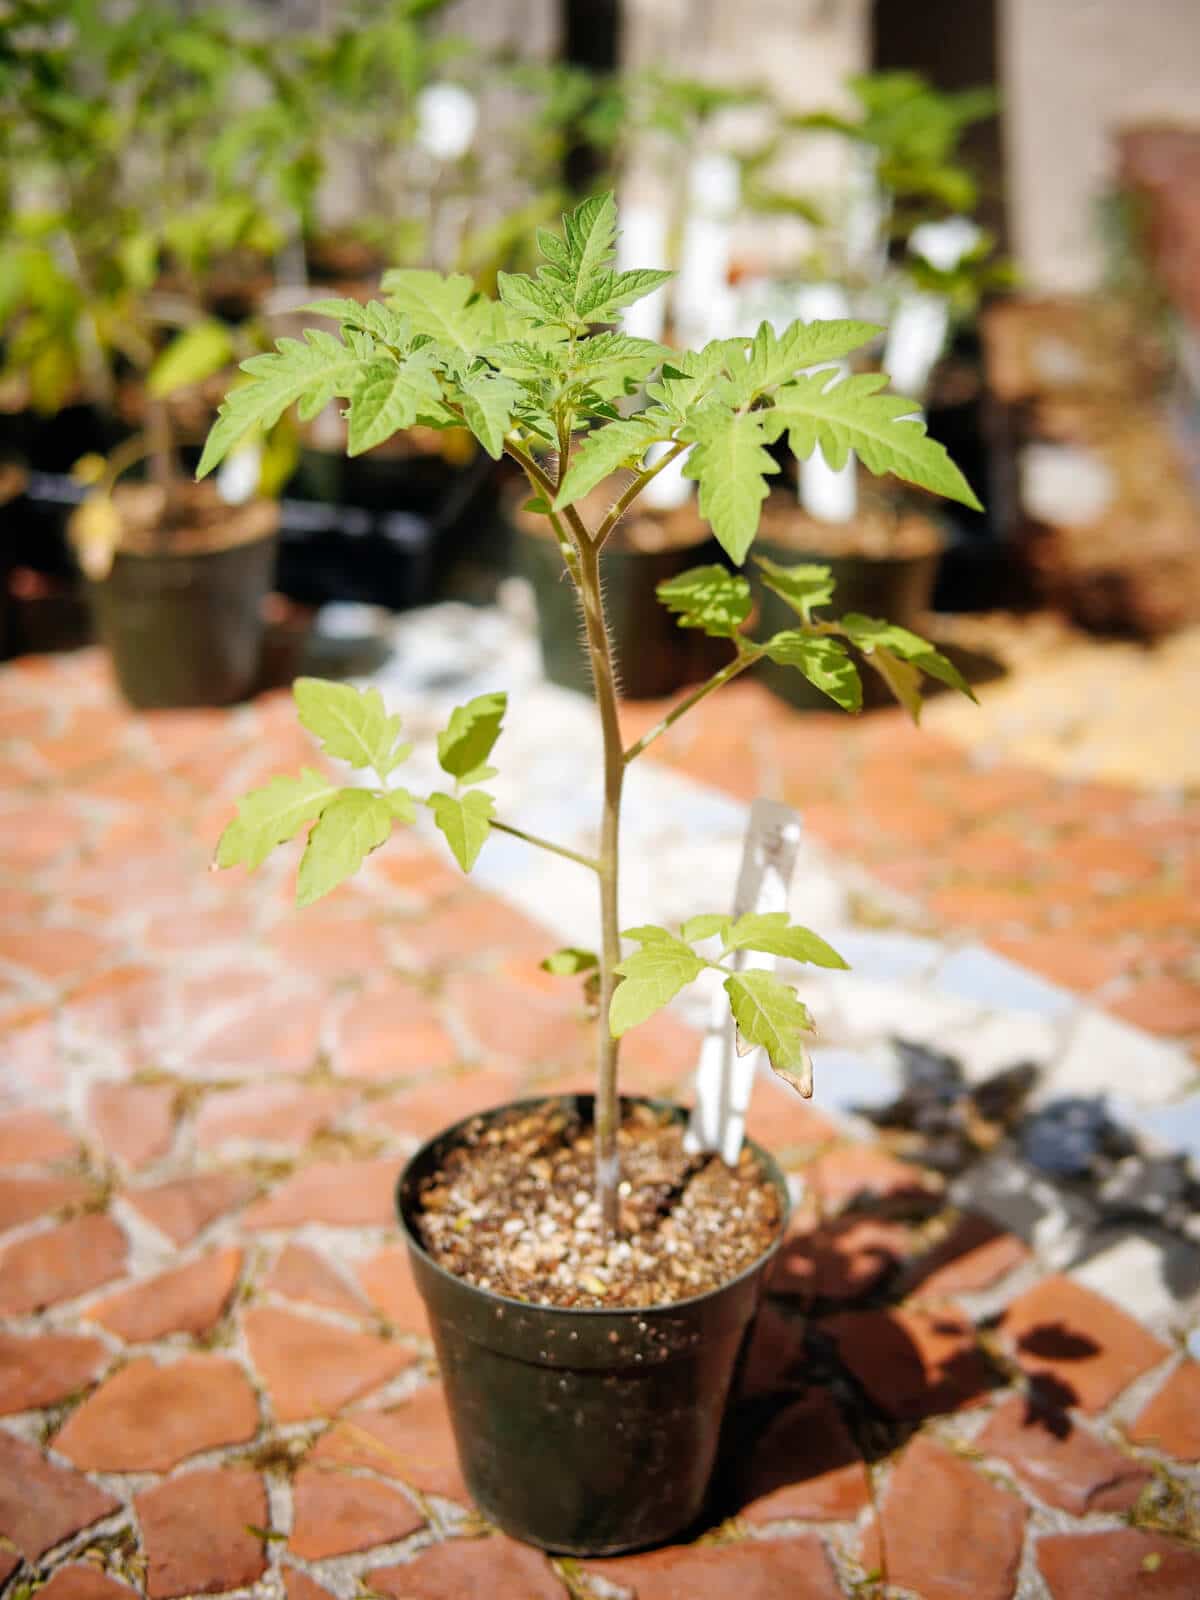
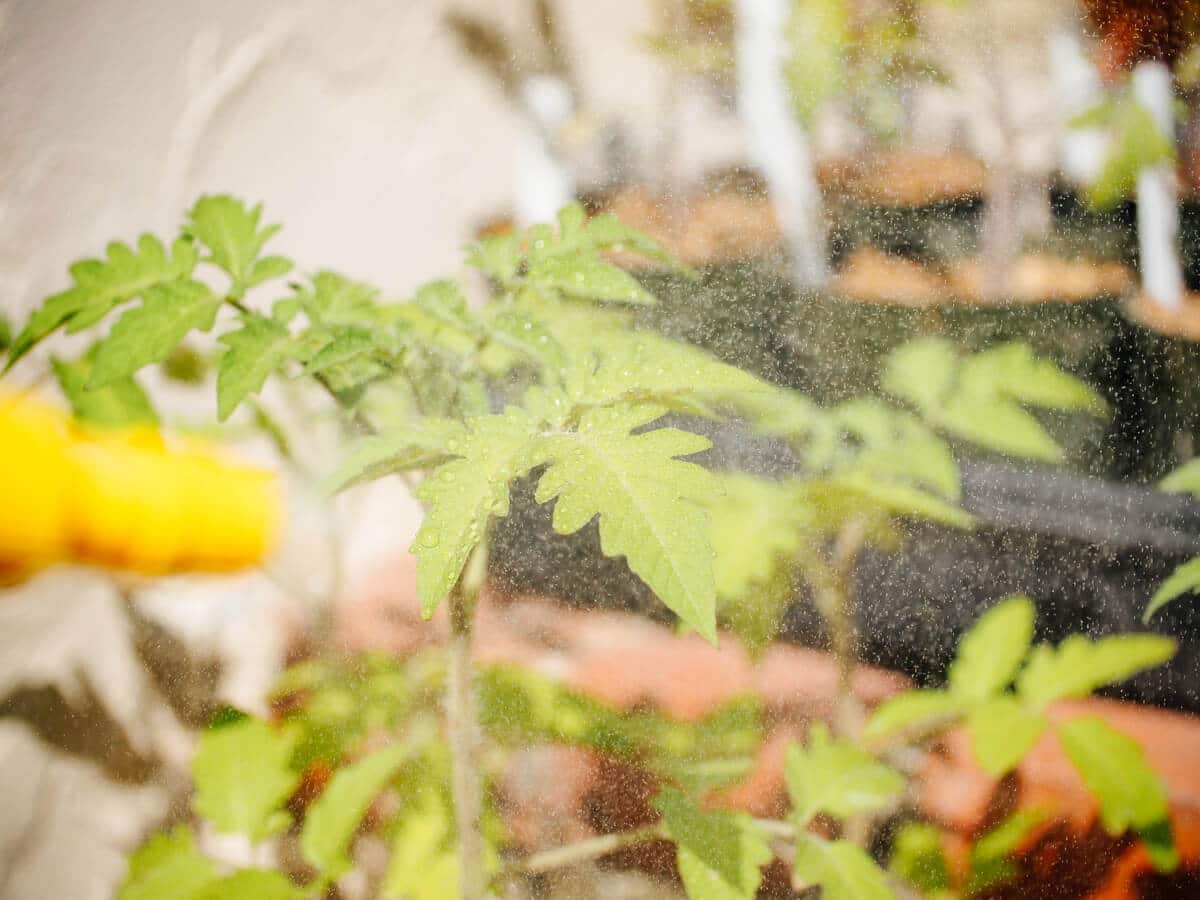
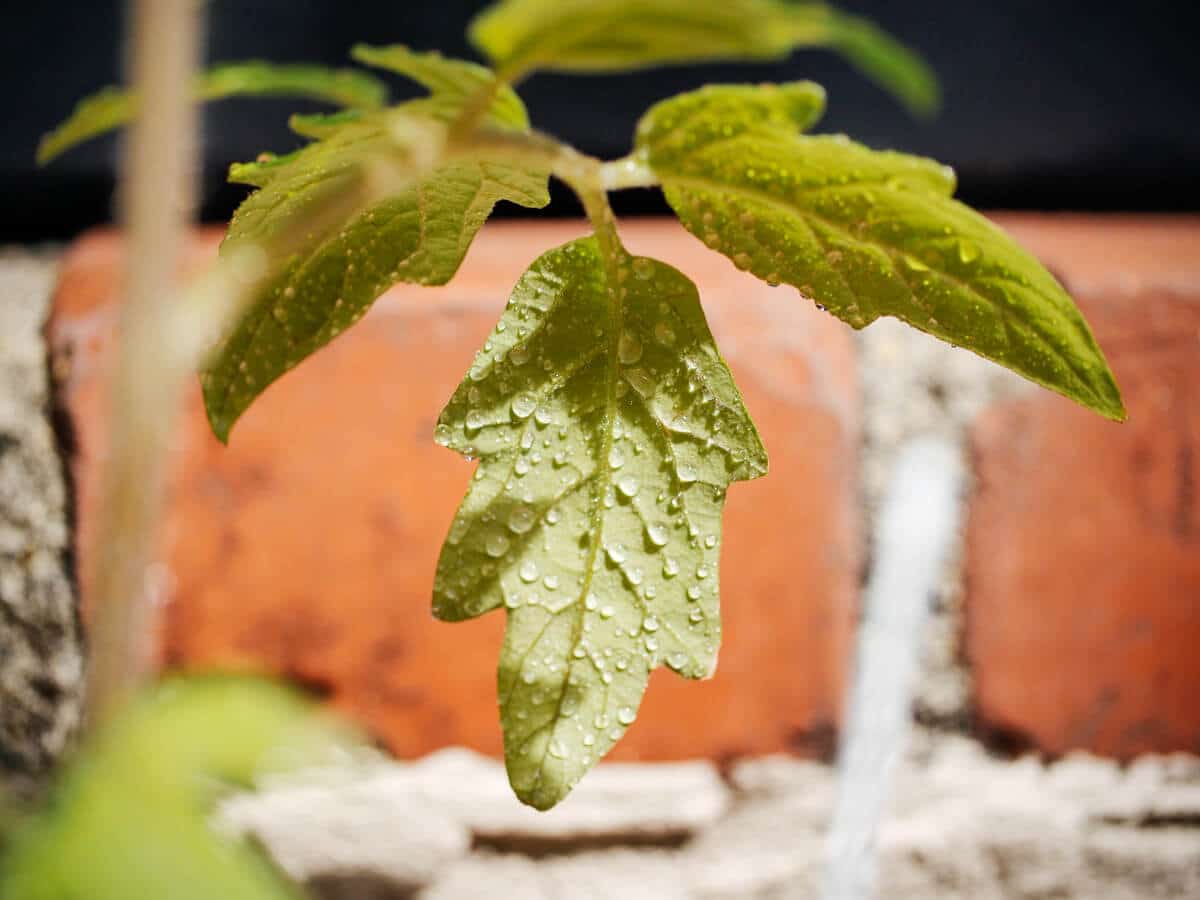
A couple of days before I transplant, I shower my tomato plants with aspirin spray to prepare them for the move.
Aspirin (the same stuff you can find at the pharmacy) contains salicylic acid, a chemical compound that’s naturally present in most plants.
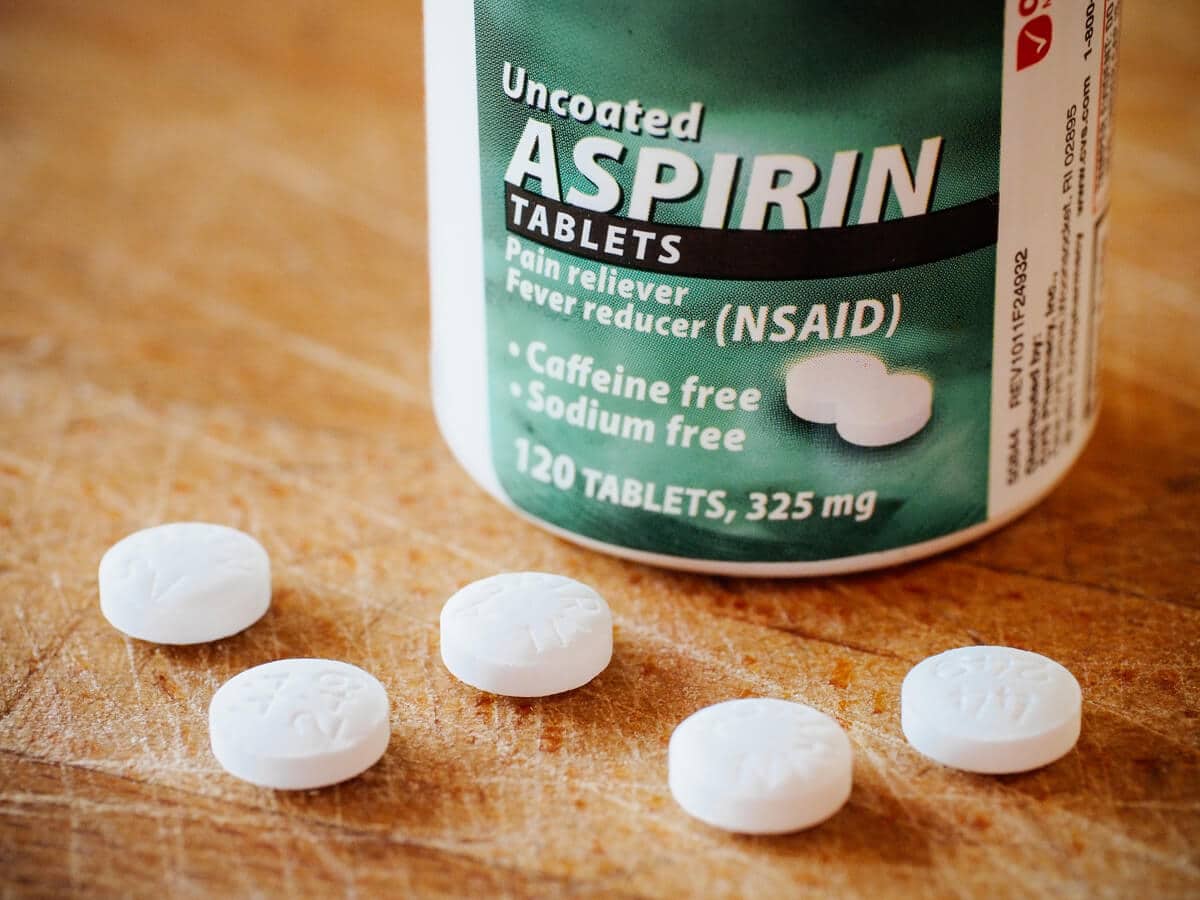
Studies have found that in a tomato plant, salicylic acid (a plant hormone) is produced at high levels in response to a microbial attack on the plant.
Oftentimes, this response happens too late in the natural cycle. But since we know salicylic acid triggers the plant’s defense system, we can give our tomato seedlings a little immunity boost before they go in the garden and have to face all kinds of microbes, good and bad.
To make a foliar spray, dissolve a regular-strength aspirin tablet (325 mg) in a gallon-size sprayer or watering can.
Try to find uncoated aspirin as it dissolves easier; no need for brand names, I looked for the cheapest aspirin at my local drugstore and found a generic version on sale.
Thoroughly spray all the leaves, making sure to get the undersides.
Prepare the hole for planting
A couple days after their aspirin shower, your tomatoes are ready to go in the ground.
You want to avoid transplanting in the middle of a glaringly sunny day or a ferociously windy day, which could add undue stress to the plant.
Wait for a bit of cloud cover, or transplant in late afternoon when the sun is lower and your tomatoes have a chance to recover from transplant shock.
Step 1: Dig the hole.
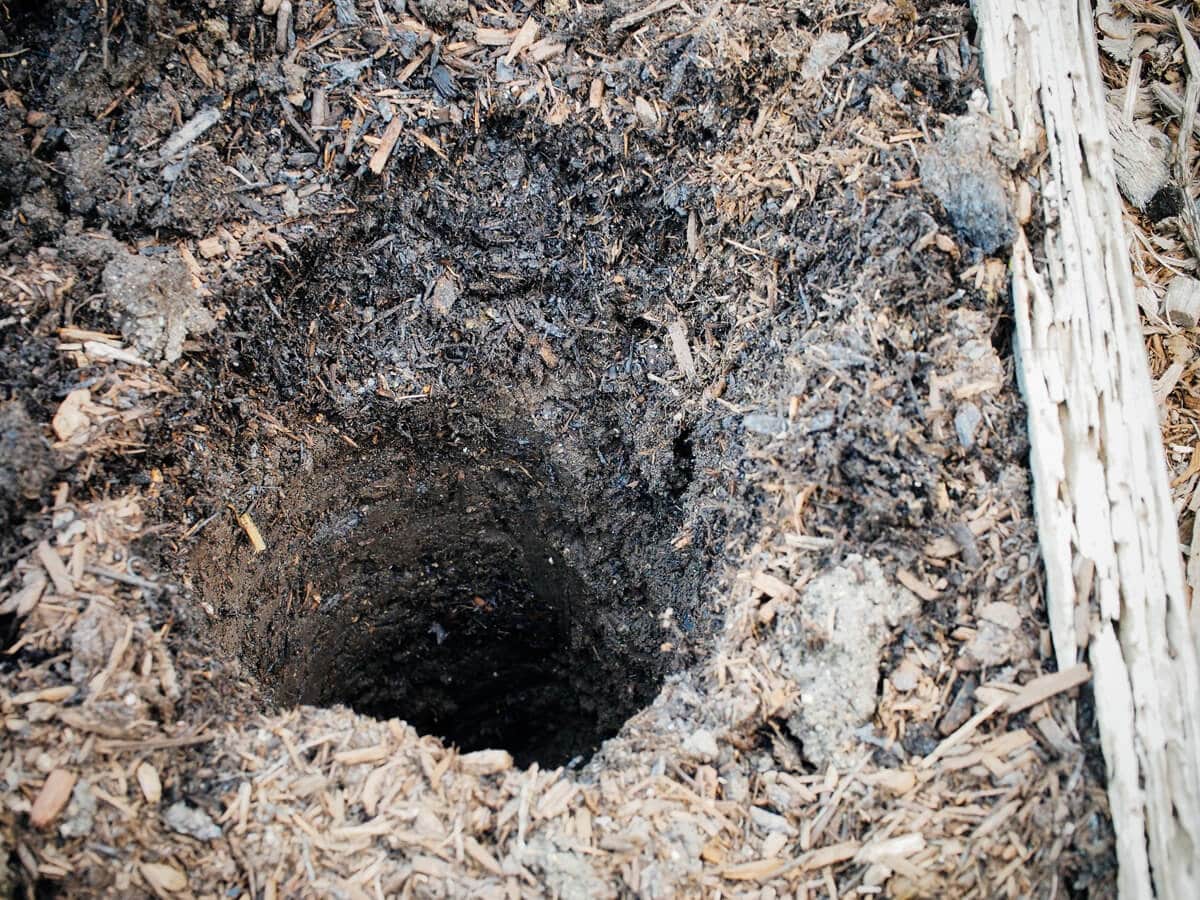
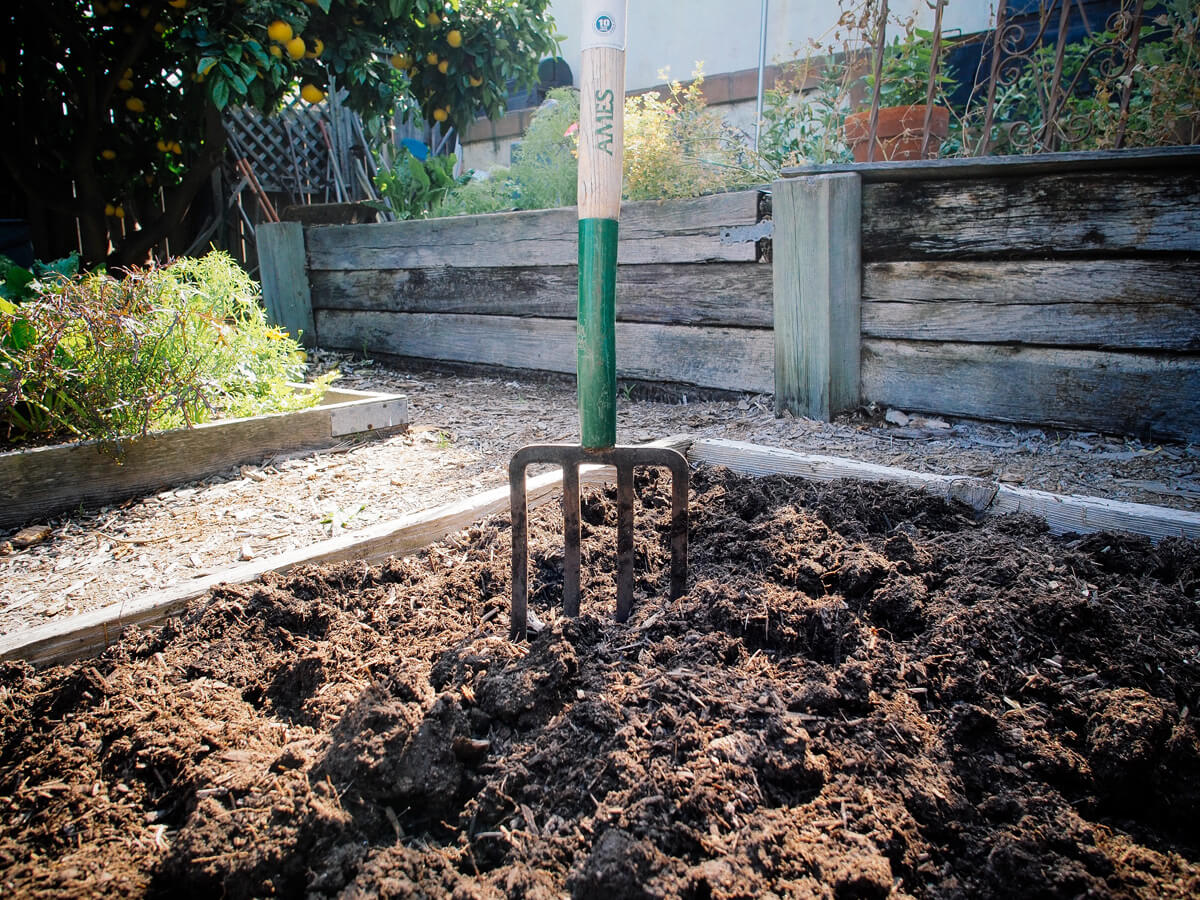
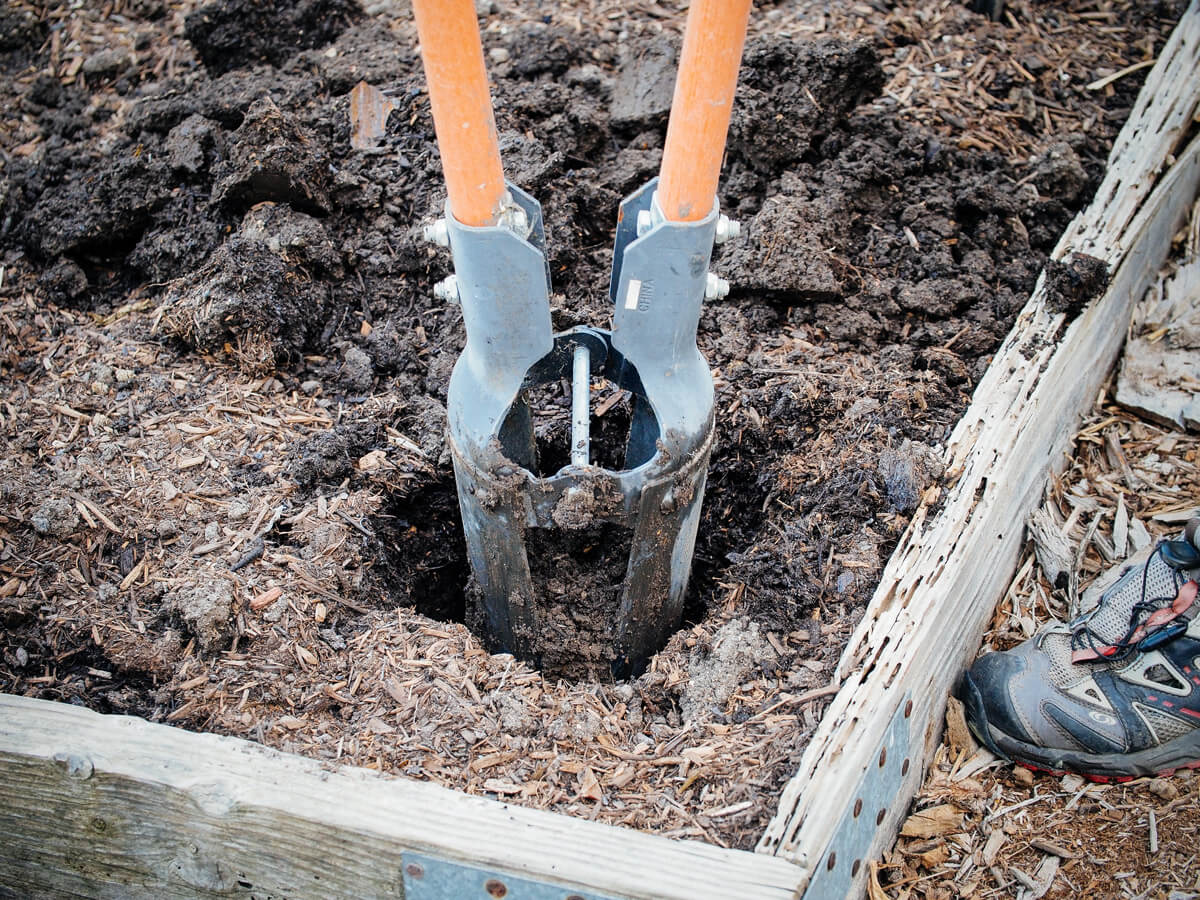
In your freshly prepared bed, dig a 1-foot-deep hole. You want enough room to throw a bunch of soil amendments down the tomato planting hole, as well as bury the stem up to its lowest set of leaves.
If you’re transplanting a larger plant from a gallon-size container, there’s no need to dig a 2-foot-deep hole. Simply dig a 1-foot-deep trough and plant your tomato sideways in this trench.
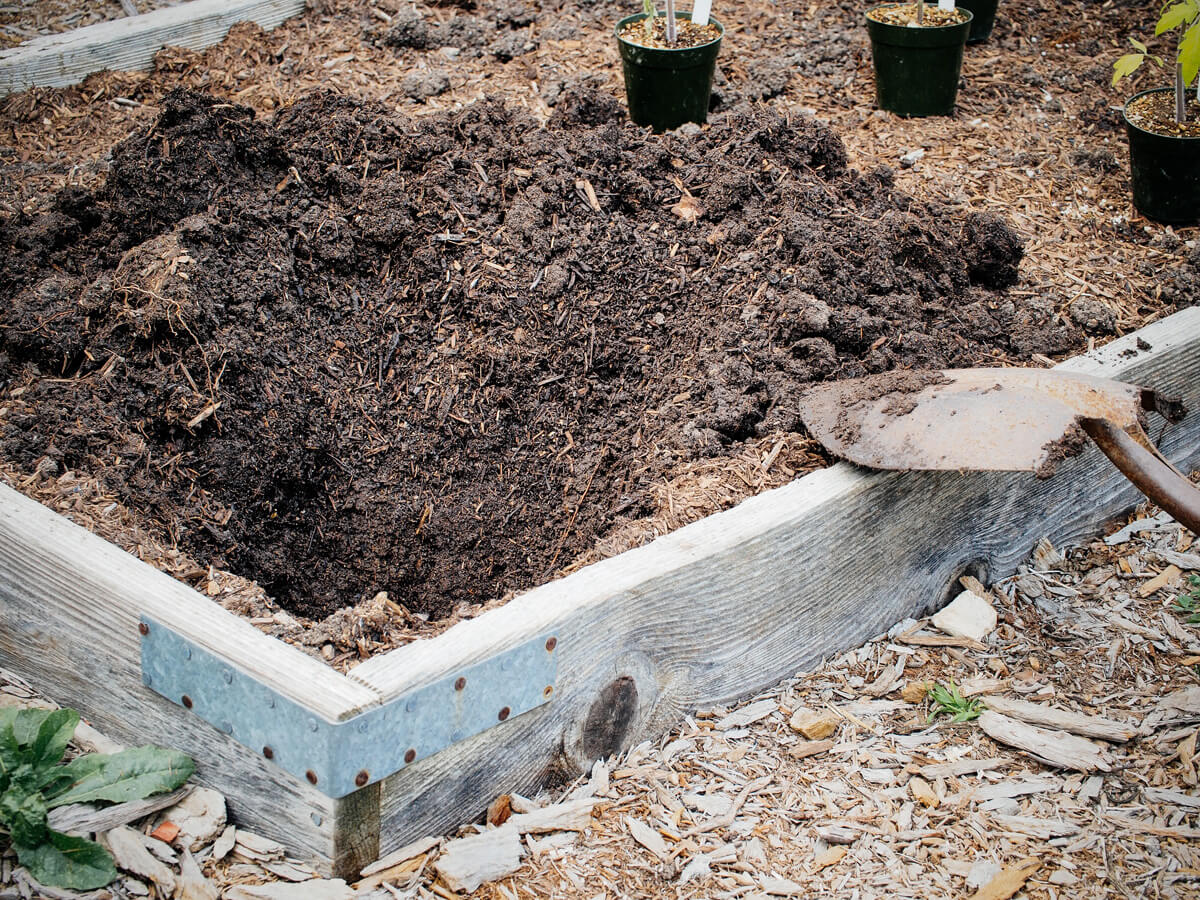
Oh, and if you have a post hole digger, now is a good time to break it out as it makes the deep-hole-digging much easier… or at least, my husband made it look easy, after I’d painstakingly dug the first five holes with a shovel.
But his post hole digger holes? Perfect, every time.
Step 2: Add your fish head.
First down the hole, and our secret ingredient when planting tomatoes, is a fish head.
Yes, a raw fish head! (Fresh or frozen works equally well.)
I used to get mine from the local fish market for 90 cents a pound, but now I try to save and freeze the heads whenever I procure whole fish.
If you’re resourceful, you might even find them for free. Call around to restaurants and supermarkets, or make friends with fishermen. I use pretty hefty heads that weigh about a pound each.
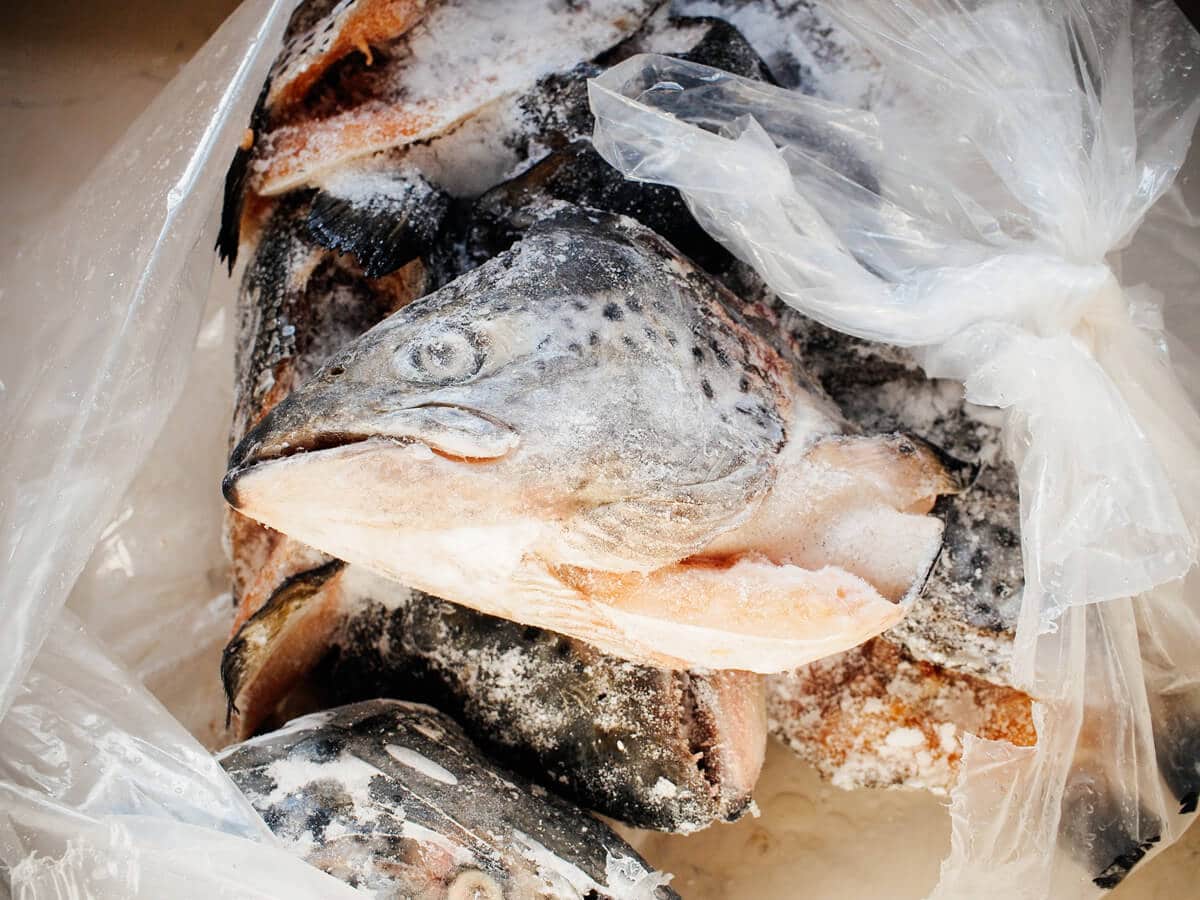
So why would I throw a fish head down the hole?
Growing up in a seafood-loving household, I remember watching my parents bury all kinds of seafood (fish heads included) in the garden, and growing some pretty remarkable things for living in the arid landscape of Southern Nevada.
And maybe you’ve heard tales of people burying fish heads under their rosebushes or between rows of crops to fertilize their soil.
Fish heads are not merely folklore in the garden. They’ve been used as natural fertilizer for centuries all over the world, and in fact, the American Indian Squanto taught the Pilgrims how to sow seeds with a small fish.
Raw fish decays quickly in the ground, releasing nitrogen, phosphorus, calcium, and trace minerals to roots. And as we know, tomatoes especially love phosphorus and calcium!
But you don’t have to limit yourself solely to fish heads. Fish guts, fish bones, and shrimp shells all work well as fertilizer, as do whole carcasses from large salmon (eat the fillets but leave the heads and excess meat that you can’t scrape off).
If, heaven forbid, you find your pet fish floating belly up in your aquarium one day, don’t flush it down the toilet. Bury the dead fish in your garden to fertilize your tomatoes and other plants!
Use whatever is cheap or free, I say.
Buried a foot deep, fish are not likely to be dug up by critters—and I have entire families of raccoons patrolling my property every night. (Personally, I think it’s too much work for them when they have a veritable buffet of trash cans lined up on the street.)
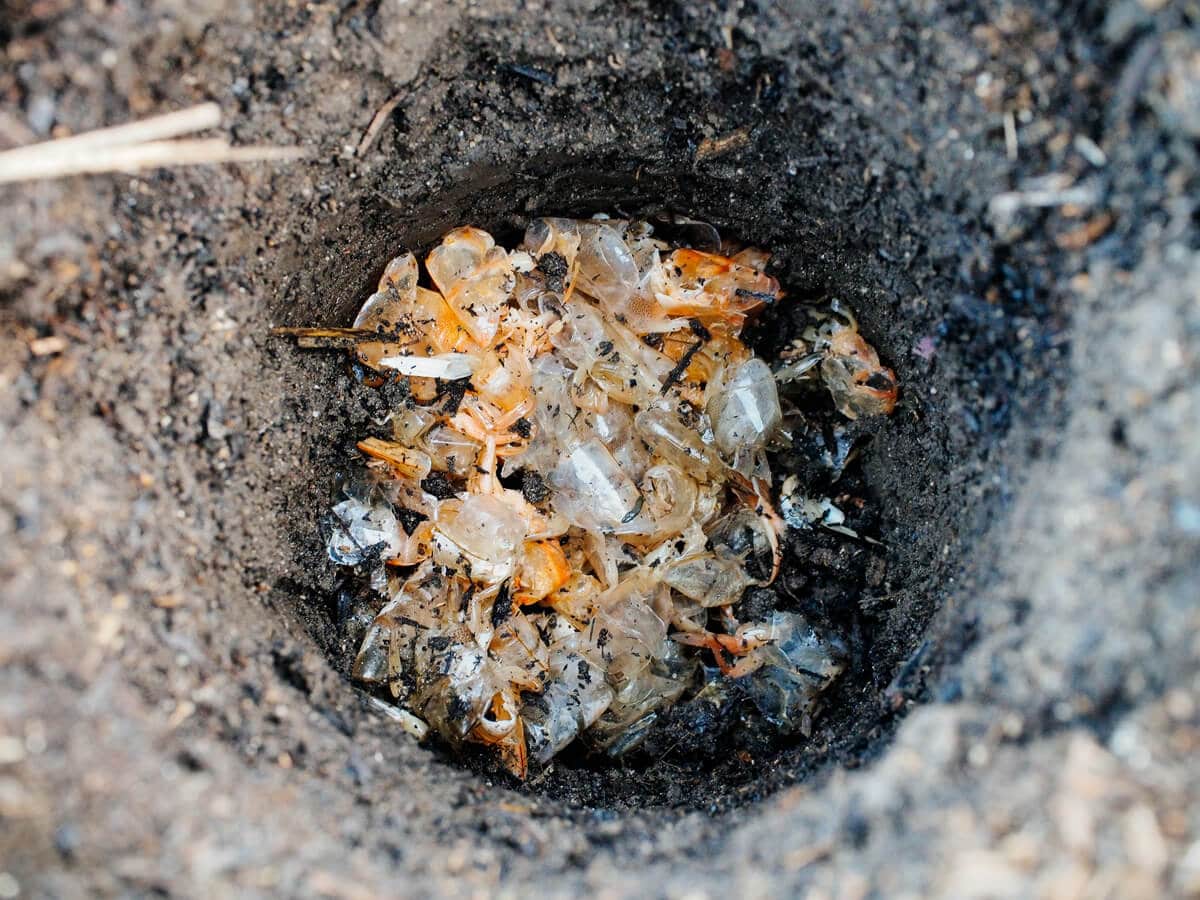
Step 3: Continue adding amendments to the planting hole.
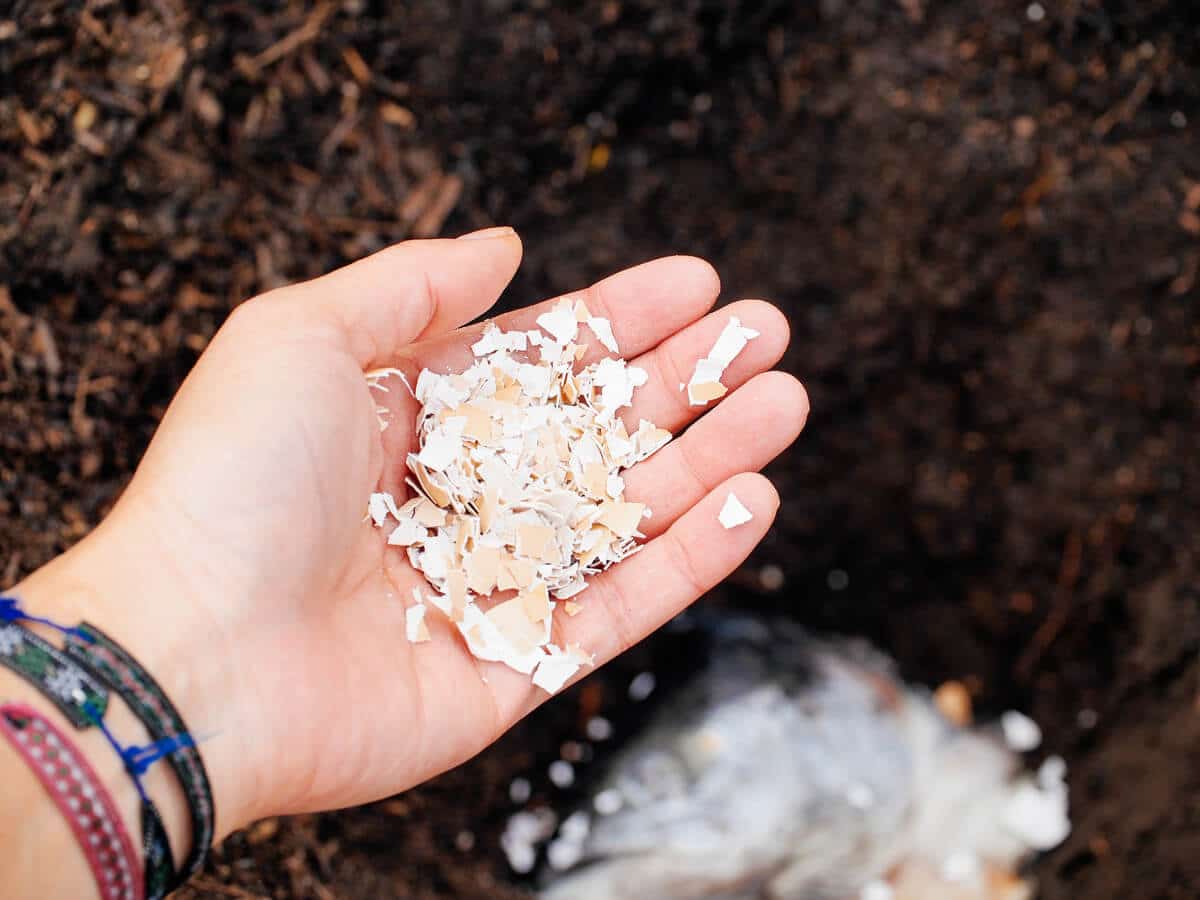
Next to go down the hole are two aspirin tabs (for a shot of immunity) and a handful of crushed eggshells (for a calcium boost).
It should be noted that the eggshells won’t benefit your plants this season, as they take a while to break down into usable calcium—but they will benefit your plants when your crops rotate back to the same bed in a couple years (assuming you use a regular crop rotation schedule, which every gardener should as a best practice).
So why add eggshells now? Honestly, I just make it a habit to add a (free) calcium source when I’m already amending the soil in spring (as tomatoes are always the first major summer crop to be transplanted).
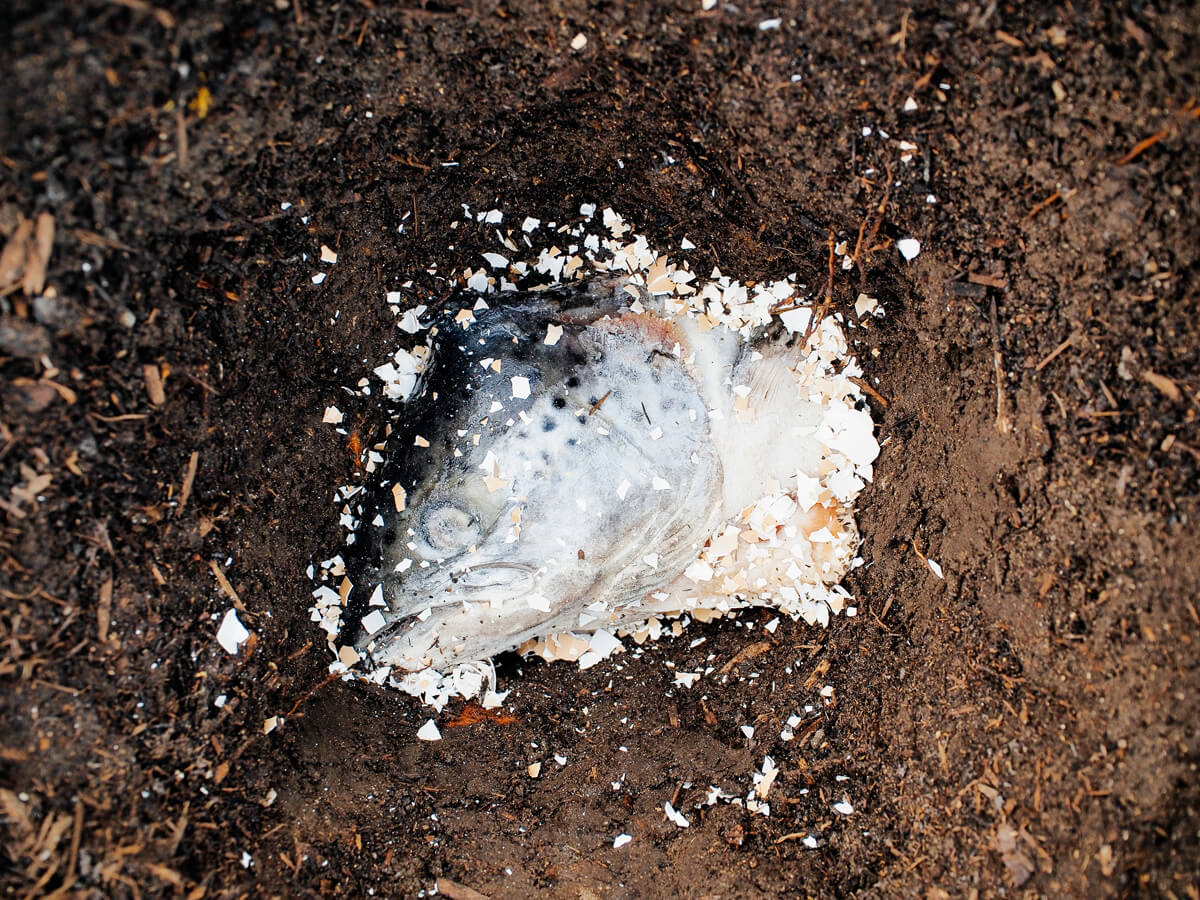
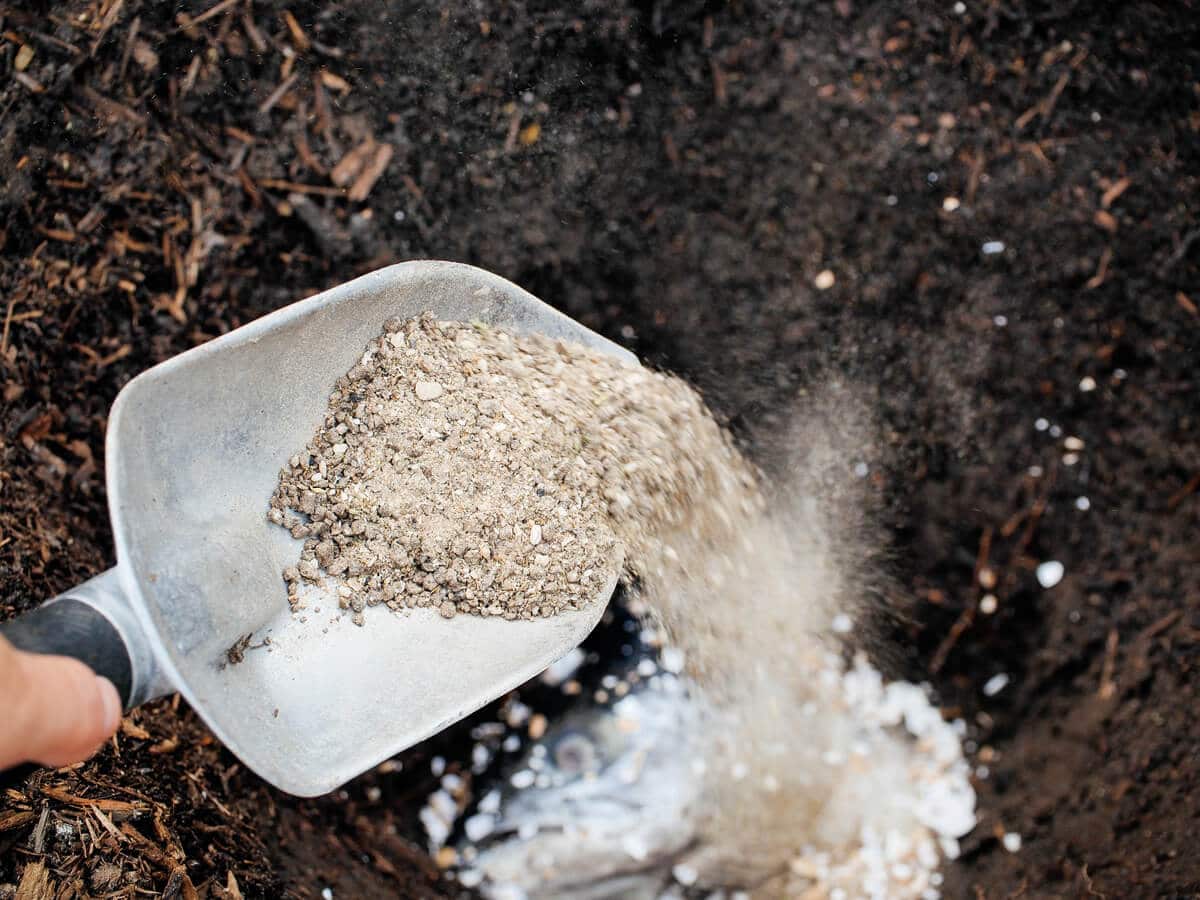
Then, I add about a half-cup of fertilizer specially formulated for tomatoes or vegetables (like this one) and about a quarter-cup of bone meal, which is a good organic source of phosphorus and calcium.
No measuring cups necessary, I just eyeball everything in my trowel.
I cover these amendments with a couple inches of soil, then water them in.
Step 4: Bury the tomato plant.
Before your tomato plant goes in, pinch off the lowest two or three sets of leaves on the stem.
Gently loosen the root ball with your hands and lower the plant down the hole. The soil line should be right at the last set of leaves; the rest of the stem gets buried, as new roots will grow from any part of the stem below ground. (I talked more about adventitious roots in my original post on repotting tomatoes.)
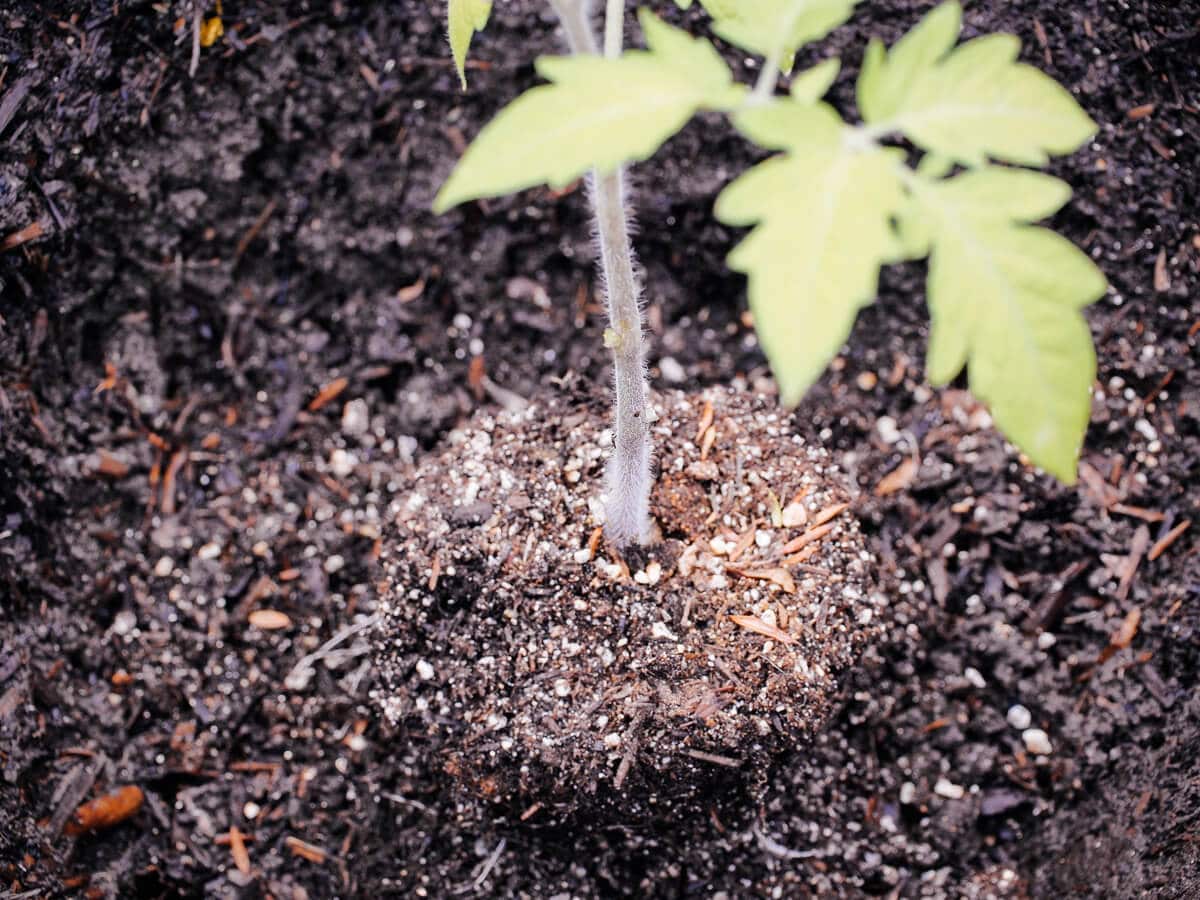
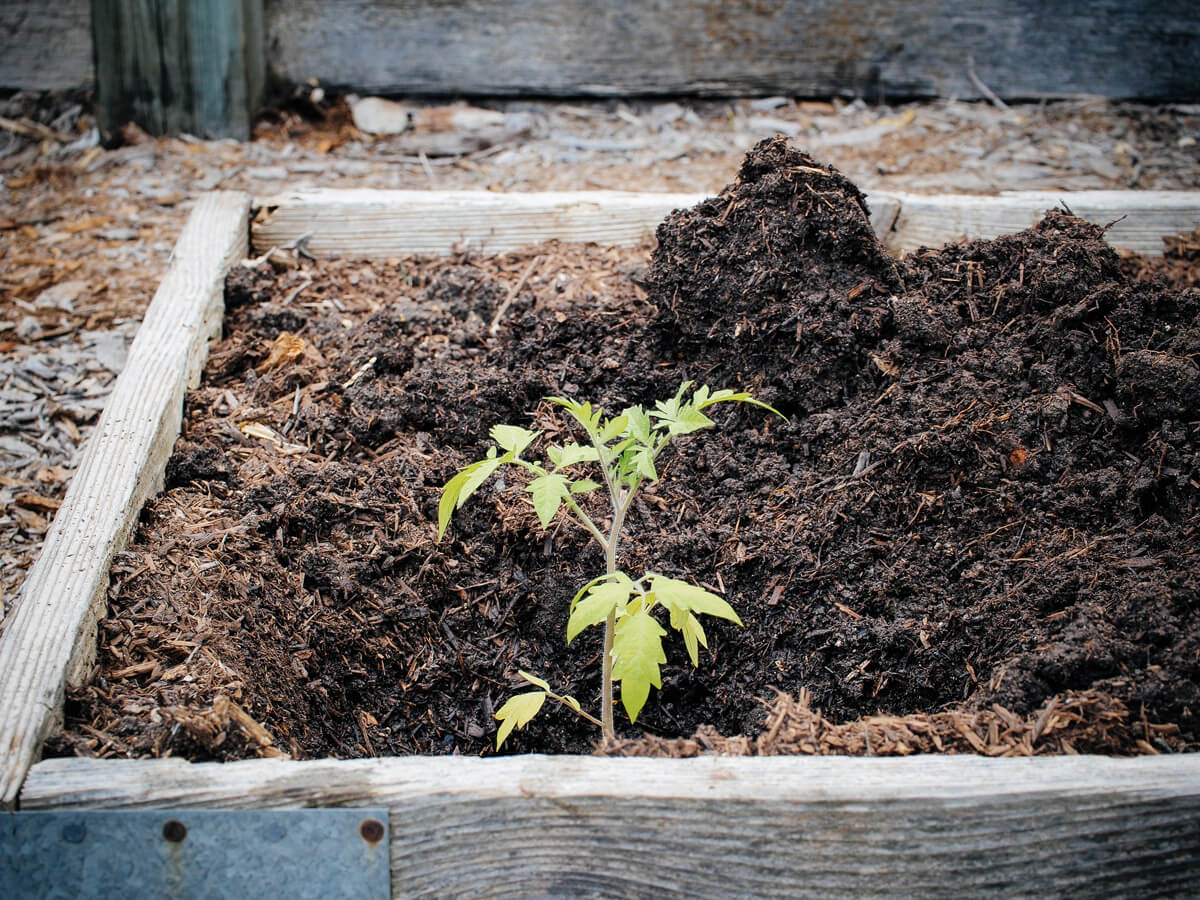
Backfill the hole with soil (avoid tamping it down vigorously with your hands or trowel, as it will settle naturally) and create a small well around the plant.
Water your plant deeply (don’t be stingy!)
Finally, water your tomato plant deeply and thoroughly.
You want the water to reach the very bottom of the roots, which are now 8 inches below the surface. I use upwards of a gallon of water per plant, letting the water fully drain into the soil between each soak.
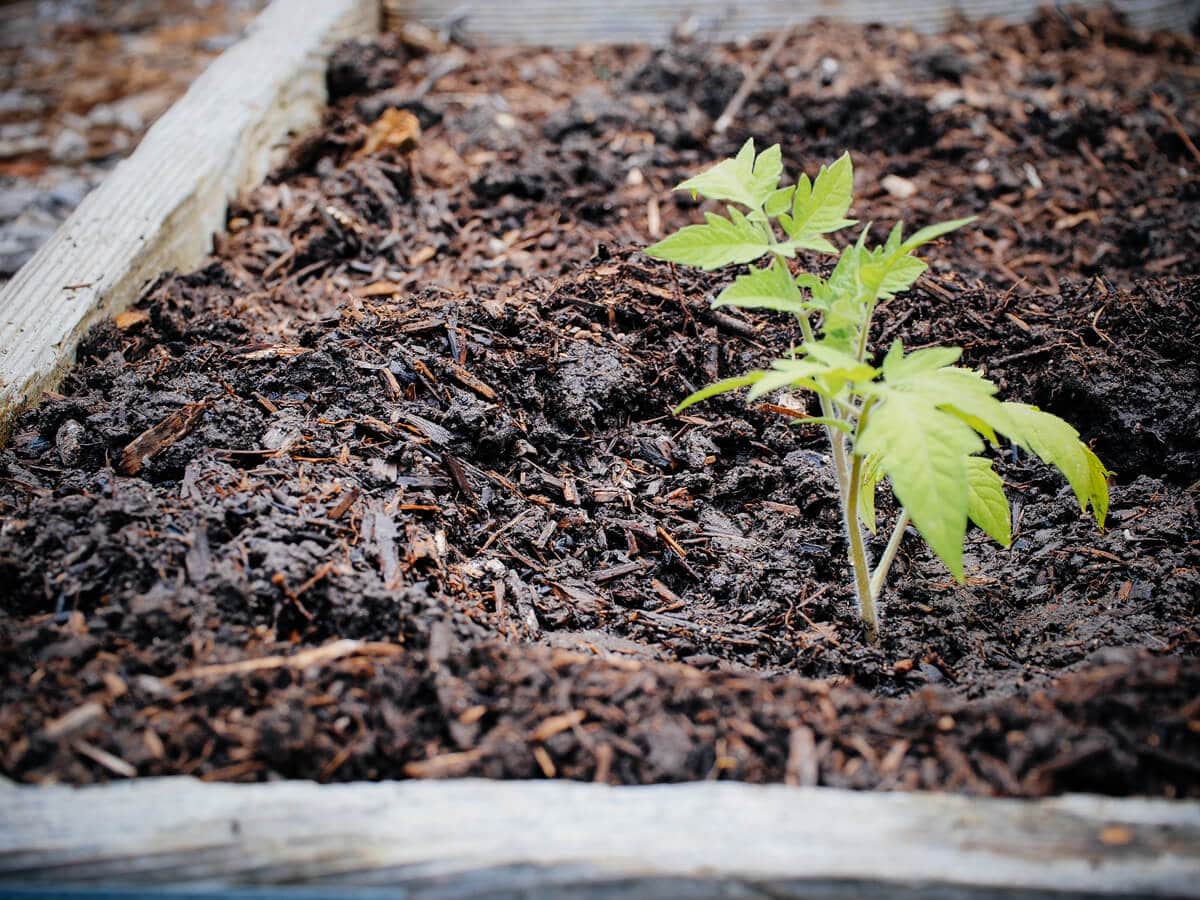
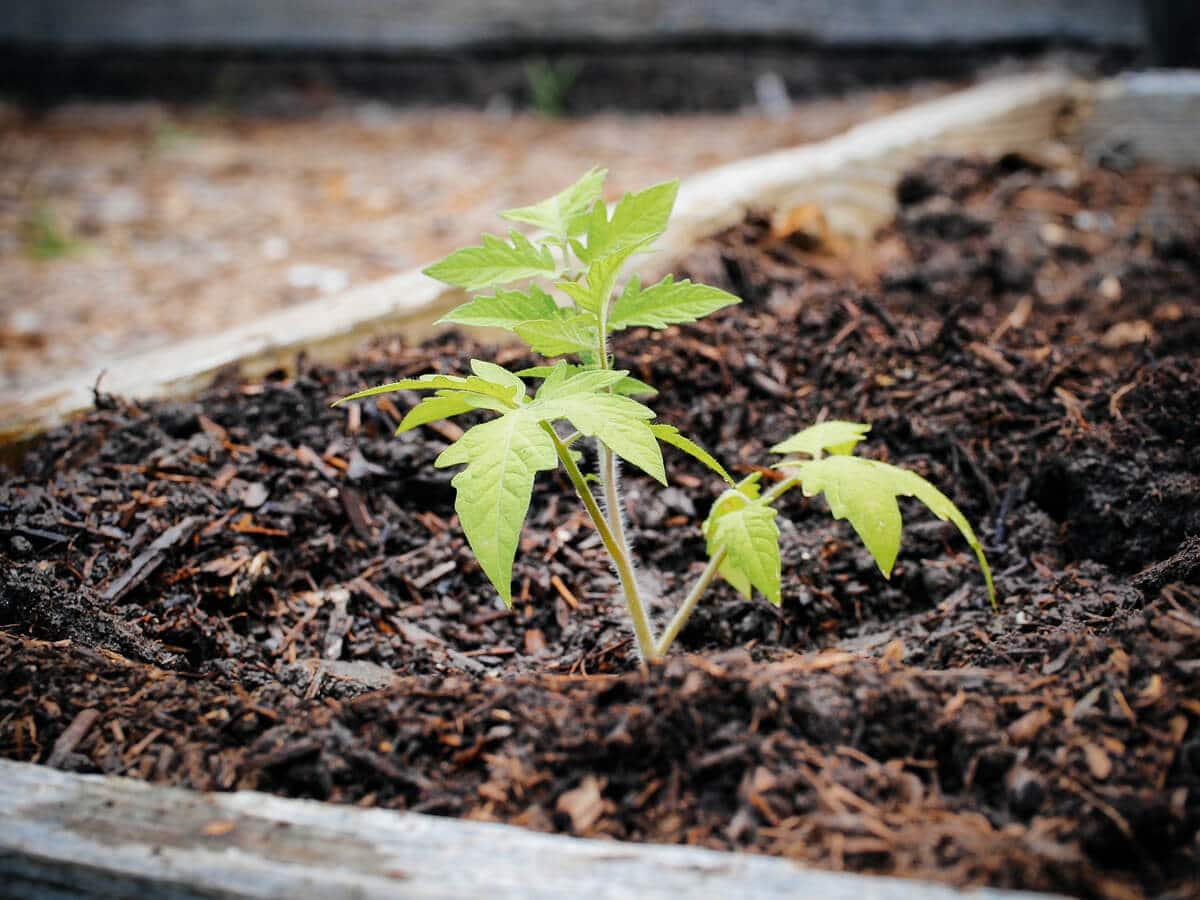
After that initial watering, your plants will only need a deep watering once or twice a week, depending on your climate. A moisture meter like this one is a good, cheap investment to make sure you aren’t underwatering or overwatering.
I generally water tomatoes when the first 3 to 4 inches of soil feels dry to the touch; remember, their roots are waaaay down there, especially as the season goes on.
Mulch, stake, and fertilize your plants as they grow
If you’re transplanting more than one tomato plant, space them at least 2 feet apart so they have plenty of air flow between the foliage.
Good to know: You can maximize your garden harvests with this biointensive planting method (chart included)
I usually wait until my plants are at least a foot tall (and the leaves are further from the soil) before I mulch the bed with straw, pine straw, shredded leaves, or sheep wool. (Any of these organic mulches are great options to use in a vegetable garden.) Mulch holds in moisture, and any dampness on or near the leaves can lead to disease, especially on a susceptible young plant.
For staking options, I personally like the Florida weave method if I’m growing rows of tomato plants, but plenty of caging options exist.
If you plan to grow tomatoes year after year, consider investing in sturdy square cages, and not the cheap, flimsy metal ones that look like upside-down cones.
You should stake your plants sooner than later, before the roots have a chance to sprawl and you risk damaging and disturbing them.
Feed your plants throughout the season with your preferred fertilizer. I alternate between tomato fertilizer and fish fertilizer, and always see accelerated growth with loads of blossoms.
Come summer, those once-little seedlings will turn into thick, verdant vines laden with luscious tomatoes!
Turn them into easy homemade tomato sauce (with the skins on!) or make oven-dried tomatoes with your harvest. At the end of the season, any immature fruits left on the vines can go into a batch of pickled green tomatoes or green tomato salsa verde.
What can I use if I don’t have a fish head?
I get it, not everyone has access to (or wants to deal with) fish heads. You definitely have an alternative here: fish meal. The nutrient-rich powdered fertilizer is made from dried ground fish and fish waste, and is a great way to get all the benefits of fish heads without actually handling the flesh (especially if you’re growing in containers).
You can see fish meal in action in my detailed guide to growing tomatoes in pots.
Where to buy
Tools and supplies from this article
This post updated from an article that originally appeared on March 31, 2014.
More tomato growing posts to explore:
- Grow Tomatoes Like a Boss With These 10 Easy Tips
- How to Grow Tomatoes in Pots—Even Without a Garden
- How to Best Fertilize Tomatoes for the Ultimate Bumper Crop
- How to Repot Tomato Seedlings for Bigger and Better Plants
- Why and How to Transplant Tomatoes (a Second Time)
- Planting Tomatoes Sideways: How Growing in a Trench Results In Bigger Healthier Plants
- Florida Weave: A Better Way to Trellis Tomatoes
- Conquer Blossom End Rot and Save the Harvest
- Can You Eat Tomato Leaves? The Answer Will Surprise You
- Why Tomato Leaves Have That Unique Smell
- The Power of Fermenting and Saving Tomato Seeds
- 4 Fastest Ways to Ripen Tomatoes in the Garden and Beat the First Frost
- The 30 Best Tasting Heirloom Tomato Varieties (By Color!)
- 83 Fast-Growing Short-Season Tomato Varieties for Cold Climates
- The Best Time to Pick Tomatoes for Peak Quality (It’s Not What You Think!)






Hi Linda! I decided to try to learn how to garden this year, and your blog has been super helpful. 🙂 I want to grow a tomato plant in a container – can I still follow these instructions if it won’t be planted in the ground?
Yes, just make sure you use a large enough pot for your tomato plant. (Or if growing a smaller determinate variety, use a smaller fish head.)
Update: Planted my wimpy little tomato seedling according to your instructions a few months ago, and it’s HUGE now. Thanks for the advice. 🙂
Woohoo!
Can entire fish be put in the hole rather than just the heads? I’m talking small 8-10 fish. I wasn’t too happy with my tomatoes this year, need to figure out a way to make them better next year. I’m glad i found this article.
Sure, use whatever is most cost-efficient for you!
Just tried a ripe tomato and it tastes of iron ! Any suggestions? I’m growing then in a greenhouse in the UK, and used liquid feed. Thinking of disposing of the lot !
Sorry, I have no idea what the problem could be, but it sounds like it stems from the soil or fertilizer you use.
I wonder if that iron taste is a dangerous bacterial infection. It reminds me of a big problem I had last year with dehydrating tomato slices. I had switched off the dehydrator overnight, for safety reasons, then restarted it the following morning. The tomato slices first began foaming slightly then went black after a time, before fully drying, and smelled like iron. I’m sure it had to do with undesirable fermentation, while sitting warm, for a prolonged period overnight. Did your tomato have any black spots in it?
Hi Linda!
This post was THE most helpful starting my tomatoes this year. THANK YOU! I live just north of DTLA and this was my first time trying to grow tomatoes in Southern California. I moved to a new place with a front yard in June, so I started my seedlings accordingly knowing I wouldn’t be able to actually plant them until June (I know this is very late) Things have ben going well, but I have a MAJOR spider mite problem. I have tried a few things and nothing seems to help and it’s gotten pretty out of hand! I water when they start to be wilty and droopy…I know tomatoes like to be HOT and don’t really like to be wet.
I tried a neem spray I had on hand and it did not help at all! Bonide 022 Ready-to-Use Neem Oil.
I have another insecticidal soap that has rosemary and peppermint oils in it that works well for aphids, but doesn’t work on the mites either, and burns the plants even when I use at night. I don’t remember the brand at the moment.
I just ordered “Safer Brand” 3 in 1……
I have diatomaceous earth. I have thought of trying to create a spray?
Lady bugs!?
I have Alaska fish. Foliar spray? But tomatoes don’t like to get wet?
They are all over my eggplant too. I have tried to trim back effected parts of the plants but if I keep doing that….there won’t be much left.
What might be a good way to prevent this in the future? A ring of diatomaceous earth around each plant to get them before they start to climb??
Any insight would be much appreciated!
Spider mites are some of the worst pests! And they thrive in hot, dry weather, so the drought isn’t helping the situation.
If you haven’t already, you should grow lots of beneficial plants around your vegetable garden to encourage the good bugs to come in. Spider mites have natural predators like ladybugs and big-eyed bugs, and these predators are attracted to plants like yarrow, tansy, marigolds, and umbellifers (the flowers found on dill, fennel, and Queen Anne’s lace). You can buy ladybugs, of course, but they won’t stick around if they don’t have a food source.
If you use insecticides, be careful that they don’t eliminate those good bugs. Some of them target ALL bugs, not just the bad ones. Another drawback to insecticides is that they sometimes don’t reach the leaves if you have a heavy spider mite infestation, since the webs can block the sprays.
The key to keeping spider mites under control is to make sure your plants are not stressed for water. Make sure they’re heavily mulched to conserve moisture and have adequate water, especially in summer. You should not wait until they look wilty and droopy before watering; they need consistent moisture to maintain their health and vigor. If plants are stressed, their chemistry changes which actually makes them more appealing to pests. (This is one of the reasons aphids tend to show up at the end of the season, when many plants are on their last legs.)
You are right in that tomato plants do not like to be wet; however this mostly applies in the evenings, and to plants that are not properly mulched. To combat a spider mite problem, you can use a forceful spray of water on the leaves (especially the undersides) to try to dislodge the mites and their webs. Do this early in the morning so the leaves have time to dry out before nightfall. Make sure the plants are mulched, which keeps the soil from splashing water onto the leaves (and introducing bacteria or fungi that way).
Tomatoes generally like hot weather, but TOO hot weather can prevent fruit from setting. If your daytime highs are consistently over 90F, you might see your blossoms dropping before turning into fruit. They just don’t do well in extreme temps, so if summertime is especially harsh where you live, it’s a good idea to provide some shade midday to protect tomato blossoms and immature fruit. Otherwise, you may need to look into growing more heat-tolerant tomato varieties.
Hope all of this helps!
Savannah Zendejas liked this on Facebook.
7 Heavenly Hens GARDEN liked this on Facebook.
Matti Salomaki liked this on Facebook.
Carrie Maggard Campbell liked this on Facebook.
Olivia Fletcher liked this on Facebook.
Cubit’s Seed Company liked this on Facebook.
The Park Wife liked this on Facebook.
Brooke Laing liked this on Facebook.
Shu-Hsien Lee liked this on Facebook.
Teri Olsen liked this on Facebook.
Starr Iraklianos liked this on Facebook.
Carie Omland liked this on Facebook.
Rafael Green liked this on Facebook.
Bryan Brown liked this on Facebook.
Aimee-leigh Bauer liked this on Facebook.
Angeline Emery liked this on Facebook.
Craig Giles liked this on Facebook.
Plants getting tall, my lemon boy only havr two flower buds, loving sad, and none have tomatoes on them. Any ideas?
Hi, without knowing any specific information about your plants and growing conditions, I’m uncertain what the issue could be.
what do you need to know, i followed your guide, two lemons and one pink lady. i took off the suckers. they are in large pots.
There could be any number of reasons for your tomatoes not flowering yet… transplant shock, irregular watering, watering too much or too little, weather too hot or cold, too much nitrogen (if you’ve been fertilizing them), not enough sun, not enough room to grow, plants are still young, varieties are late bloomers, etc.
You say your plants are in “large pots” – how large? 5 gallons, 10 gallons? If you put a whole fish head in there, that’s a lot of nitrogen with nowhere to go but into your plant, producing lots of lush foliage but no flowers. However, you also say they’re “looking sad” (again, what does that mean? Turning yellow, flowers forming but falling off?) and that could possibly be caused by one of the reasons I list above.
ive used smaller fish heads , i water them twice to once a week. weve got some heavy down pours, plenty of sun. 10+gallons – no yellowing – i just fearilerzed them with worm casing like you said to last month, . questions. how many times should i fearlizte them? and can i prune the tops off of them so they dont get any taller?
I personally would not prune the tops of your tomato plants, you want them to get tall and eventually you’ll need to stake or trellis the vines, if you haven’t already. For fertilizer, you should follow the instructions on the label as every amendment is different. Worm castings should be applied once a month at most.
will do thanks
i grow tomatoes in central Portugal and never needed more than the soil we have, lots of sun, compost and pine needles from our woods to mulch and top-dress the plants. We also use manure tea. And that’s all we use to have beautiful tomato plants.
You are one of the few lucky people with wonderful soil to begin with! And I’m jealous! 😉 I, unfortunately, deal with clay soil and must amend it every season.
Olá, Ana, tudo bem? Não consegui enviar-te mensagem pelo antigo email. Estás com algum novo email? Abraço.
That’s a great idea for the fish heads. I’m new to your site and am finding a wealth of useful information. Thanks for sharing and watch out for those Racoon’s they will ambush your chicken’s!
Thank you for reading and supporting the blog!
Your very welcome. I do have a question regarding your upcoming book. I was wondering if you have a post showing what recipes are in the book and if they are strictly vegetarian based?
Hi, I’ll be posting previews of the book in January and February as we get closer to the release date. All 105 recipes are plant-based, but this is not a strictly vegetarian cookbook. I’d say about 85-90% of the recipes are vegetarian (all real food, no meat substitutes) and there is a wide variety of starters, sides, and main dishes covering a whole spectrum of flavors, from American classics to Asian-inspired. The recipes are seasonal and don’t require trendy ingredients. I hope that answers some of your questions! Whether you eat meat or not, I think you’ll find plenty in the book to satiate your appetite. 🙂
K. I’m in the OC so I’ll probably be pre-ordering the book regardless. Not much of a red meat eater anyways. Are you on Youtube? You should start a channel if you’re not, you would make a killing!
I don’t have a YouTube page right now, but who knows… maybe some day. 🙂 Thank you for your support!
Thanks for the blog, what a great collection of info on a fun range of stuff and really nicely laid out! I do a lot of gardening/animal raising as well and found your blog from an ongoing debate with my wife about leaving chicken eggs on the counter or in the frig and how long they could last left out.
Quick question on tomatoes, do you have much problem with disease? I’m in Oakland and I bought a bunch of new heirloom tomatoes to try out this season and I have been getting hammered by powdery mildew and a decent amount of blight/wilt on the leaves as well. Way too many of the flower clusters are just drying up and not setting fruit.
Looking through your blog, you’re an impressive and thorough researcher, any chance you’ve had to battle tomato diseases much yet and have any good info to share?
I battle powdery mildew every year since I live on the coast (especially on my squash plants). Our weather is generally quite dewy, so my garden is susceptible to mildew, rust etc. I’ve found that a preventive spray of neem oil or copper fungicide (my last-ditch effort, as copper is much stronger) helps control these airborne diseases.
Soilborne diseases like wilt and early blight are best controlled by rotating your crops on a 3-year (or more) schedule. If you can leave your soil bare for at least a month in high summer, I recommend solarization, which kills those fungal spores in the soil. (It’s actually what I’ll be doing next month, as I had a problem with tomato wilt this season.) But other than that, there’s nothing you can really do once the disease takes hold on your plants. You should pull them, bag them, and trash them (I put mine in the city green bins, rather than compost them).
Sometimes soilborne diseases come from the nursery where you bought your plants. If you’re growing heirlooms, you should try starting them from seed.
Good luck!
I’ve collected seeds from a few of the plants that have been healthy enough for tomatoes to grow and I’m making sure to start them as cleanly and disease free as possible (new soil, lots of space, lots of air, not so moist), we’ll see how round 2 of the plants do. I had read about using a mix of baking soda and dish soap to stop powdery mildew, I just gave it a try, so we’ll see how it does.
I grow about half of my tomatoes in containers in a green house, and after about 4-5 months for each plant, I recycle the soil and start fresh, but I wonder if I’ve introduced the spores to my soil bins and I’m just passing it along each time I refill a container.
Have you ever played with grafting tomato plants? This is my first year trying it and so far, I’ve been a bit underwhelmed. A few of the plants are big and huge, but it hasn’t been the magic solution for mildew or any of the diseases and a bunch of the grafts that took and started growing just never thrived and took off.
Sept/Oct are so nice here, I’m getting ready for a second set of tomato plants, some to replace the ones that got hammered too badly by mildew and/or blight. I’ve never tried a fish head, but I’ll give it a shot and I had just read about planting old eggs with tomatoes and other plants, so I’ll try that one as well. And I think I’ll try potting these guys with new soil (I love the Kellogs mix as well) to see if I avoid the wilt and blight.
Soilborne diseases are easy to prevent when growing in containers because you just need to use new containers (or wash old ones in hot soapy water), new soil, and clean tools.
On tomato plants, you can reduce the risk of mildew (and many other diseases) by keeping them trellised and pruned to encourage more air flow around the leaves. And as soon as you see one plant afflicted, remove it immediately so it doesn’t infect the others.
I don’t graft tomato plants. I keep it simple in my garden. 🙂
I was hoping grafting would be my trick for keeping it simple–put that work in early and have magic heirloom tomato plants that would be disease free, vigorous growers, huge crops, but not yet.
The grafting itself is simple, two cuts, attach a clip and stick the plant anywhere you put other cuttings (shady and humid)–less time than it takes to make home fermented chicken scratch 🙂
You got me starting a batch of fermented scratch again, not so much for my birds, but for attracting black soldier flies. I had a colony going for a while, but critters got in and ate them all. BSF are great converters of anything organic into insect protein. I’ve got a good sized bird area with turkeys and ducks as well so I’m always looking for extra protein. BSF aren’t simple as much as they’re beautifully elegant in terms of making use of every thing left over on a farm.
Send me a couple starters of your favorite heirloom tomato plant (or a couple 8-10″ suckers wrapped in wet paper towels) and I’ll send you back a grafted plant
Haha, well I agree that grafting in itself is a simple thing, but I haven’t spent the time researching rootstocks, which is where most of the work lies for successful grafting.
You’re not getting off that easy 🙂 Maxifort and RST (from Harris Seeds) are two of the most popular and have great ranges of disease resistance. Instead of taking that month off for solarization, that’s where grafted plants shine-home gardens where crop rotation is harder to pull off. Add in bonus yields, earlier fruit, later fruit and better fruit setting at both temp extremes?
Maybe there’s a more perfect rootstock you could try, but you wouldn’t skip surfing at a great beach cause you knew there might be a better one if you kept looking 🙂
I’d like to second that comment you got from Rick Frey about baking soda. Last season I converted a rose garden into tomato garden. Partway through the growing season I got terrible powdery mildew on the plants. It took me some time to come up with a solution – baking soda, which I sprayed on every plant surface, on top of and underneath the leaves. It stopped the mildew dead in its tracks, but unfortunately the plants, by then, had become so weakened by the attack, that I got much less crop than should have been. This season I’ve replanted, and the plants are looking very healthy, with no sign at all of mildew. That baking soda is one of nature’s miracle solutions, useful in *many* ways!
You have taught me a great deal.
Thank you so much. My harvest is excellent and very tasty.
You a taught me a great deal.
KS
You’re welcome! Glad you’re having a great summer with your tomatoes!
Fish gut and heads make the best fertilizer! I like putting them also in my garden after growing season to prep my garden space for next year! Very nice article!
Thank you!
Are there leaves on a tomato plant that should be pinched off to help the plant produce heartier fruit rather than just leafy plants.
I personally only prune any lower branches that may be dragging on the ground, in order to help mitigate disease. I don’t find that pinching off other leaves improves production so long as your plants are watered, mulched, properly spaced, and well fertilized.
One of the best blog posts on growing tomatoes I have read. Thanks for taking the time and energy to write it. The aspirin thing I never heard of. Might give that a try.
I recently found your blog and it’s now my favorite! I am kind of new to LA (moved here from the Northeast a year and a half ago) and am beginning to experiment with vegetable gardening – your blog has taught me so much already! Thanks 🙂
Lynn
You’re welcome! Thanks for stopping by, Lynn. Enjoy your year-round gardening here in LA; you’ll love it. 🙂
Grow Bigger and Better Tomatoes This Summer! http://t.co/Vy7nQ7ycwg #gardenchat < TY for RT! @TomatoSociety @ModernSteader
From prepping to fertilizing: Grow Bigger and Better Tomatoes This Summer! http://t.co/5mbgjBS0ol < TY for RT! @LyndaByrdPlace @rhgardener1
Thanks for the detailed post, that helps. My favorite thing you said in this post, and it is extremely understated, is “you should think about “growing” your soil first.” My primary objective is to grow soil while I learn to garden. I am convinced that soil is the most important thing we can grow. 8 inches of top soil made the farm belt in this country possible.
Soil is definitely the most important component of any garden, and soil/compost/fertilizer should be every gardener’s biggest investment!
This blog was posted on my 65th birthday and you could not have given me a better gift! I have been trying to improve my soil and gardening techniques. Thank you so much for these details! I have been a follower ever since I found you via Country Living. Thanks, again, for this valuable information,
Charlene
San Fernando Valley
Happy belated birthday! And I wish you many big, healthy and productive plants this summer. 🙂
Thank you for the birthday wish. I hope that I did not offend you in my comment. I do enjoy your blog. Have a productive growing season.
No offense at all! 🙂
Wow, thanks for such detailed information! This is a great post.
You mention using fish heads or other seafood, such as shrimp shells, as fertilizer. If someone has a seafood allergy, do you know if using these fertilizers can affect the person when they eat the tomato? I’m thinking that these amendments will be broken down enough by the time the harvest is ripe, but I’m not sure.
Thanks!
Essentially, you are composting the fish heads (or shrimp shells), so microbes in the soil will break down the proteins, sugars etc. into nitrogen, phosphorus, etc. before these nutrients can be taken up by the plant roots. It seems unlikely that the allergy protein in the fish or shellfish would transfer to the fruit, but this is definitely a question for your allergist. The bigger risk here would be an allergic person handling the fish or coming in contact with the soil.
I am very tempted to go find fish heads now…
Interesting you speak about tomatoes being heavy feeders (which can be true for commercially developed lines bred for high input conditions) yet your seedlings are yellowed from lack of enough nitrogen. (Cotyledon leaves are also absent which can be an indication they did not get enough fertilizer early on)
Most tomatoes planted in the ground only need moderate amounts of fertilizer: just after they are set in the ground and again just after the first fruits get about golf ball sized (larger fruit). Phosphorus is important early on in the seedling stage (before setting out) when flower primordia are forming. Studies have shown that most of the P in fruits came from that early application and not later. P is still needed during growth as it is important for DNA synthesis and energy (ATP) but for fruit that early application is more critical. Unlike nitrogen or potassium P leaches very little so in most cases P applied in the area roots eventually develop into will be adequate.
Calcium from the eggshells will not be readily available this growing season. It’s a better to mix those in with the compost pile and apply that in the fall to the general area rather than the planting hole so it will be available.
Fair warning, If one lives in an area with scavenging varmits (raccoons, possums or even cats) they may just dig up the plants going after the fish.
It’s important to note that modern aspirin is no longer “salicylic acid” but rather acetylsalicylic acid. More recent studies, specifically with salicylic acid, suggest that much more frequent application rates are required for effectiveness (spraying the leaves every 24 hours). Salicylic acid also leaches from soil. So putting aspirin (acetylsalicylic acid) in the soil, and having to convert to salicylic acid in combination with the leaching, may have a limited effectiveness (depending on conversion, soil make up, drainage and watering frequency).
or maybe instead of the varmints digging up the fish, the varmints get thrown on the compost pile after my dogs get tired of using them as a chew toy.
Thanks for the tip on the eggshells, but if she plants tomatoes in the same spot next year…and she did the same thing last year and is planting in the same spot this year…you get where I’m going yes?
Now if you were to food forest and apply forest garden techniques it all becomes more and more moot. Assuming you want to go hardcore that is.
Cool, I didn’t know about adding (2) aspirin, thanks for sharing 🙂
The fish in the whole works great! We tried it two years ago and had amazing growth on the plants that had fish buried beneath it.